
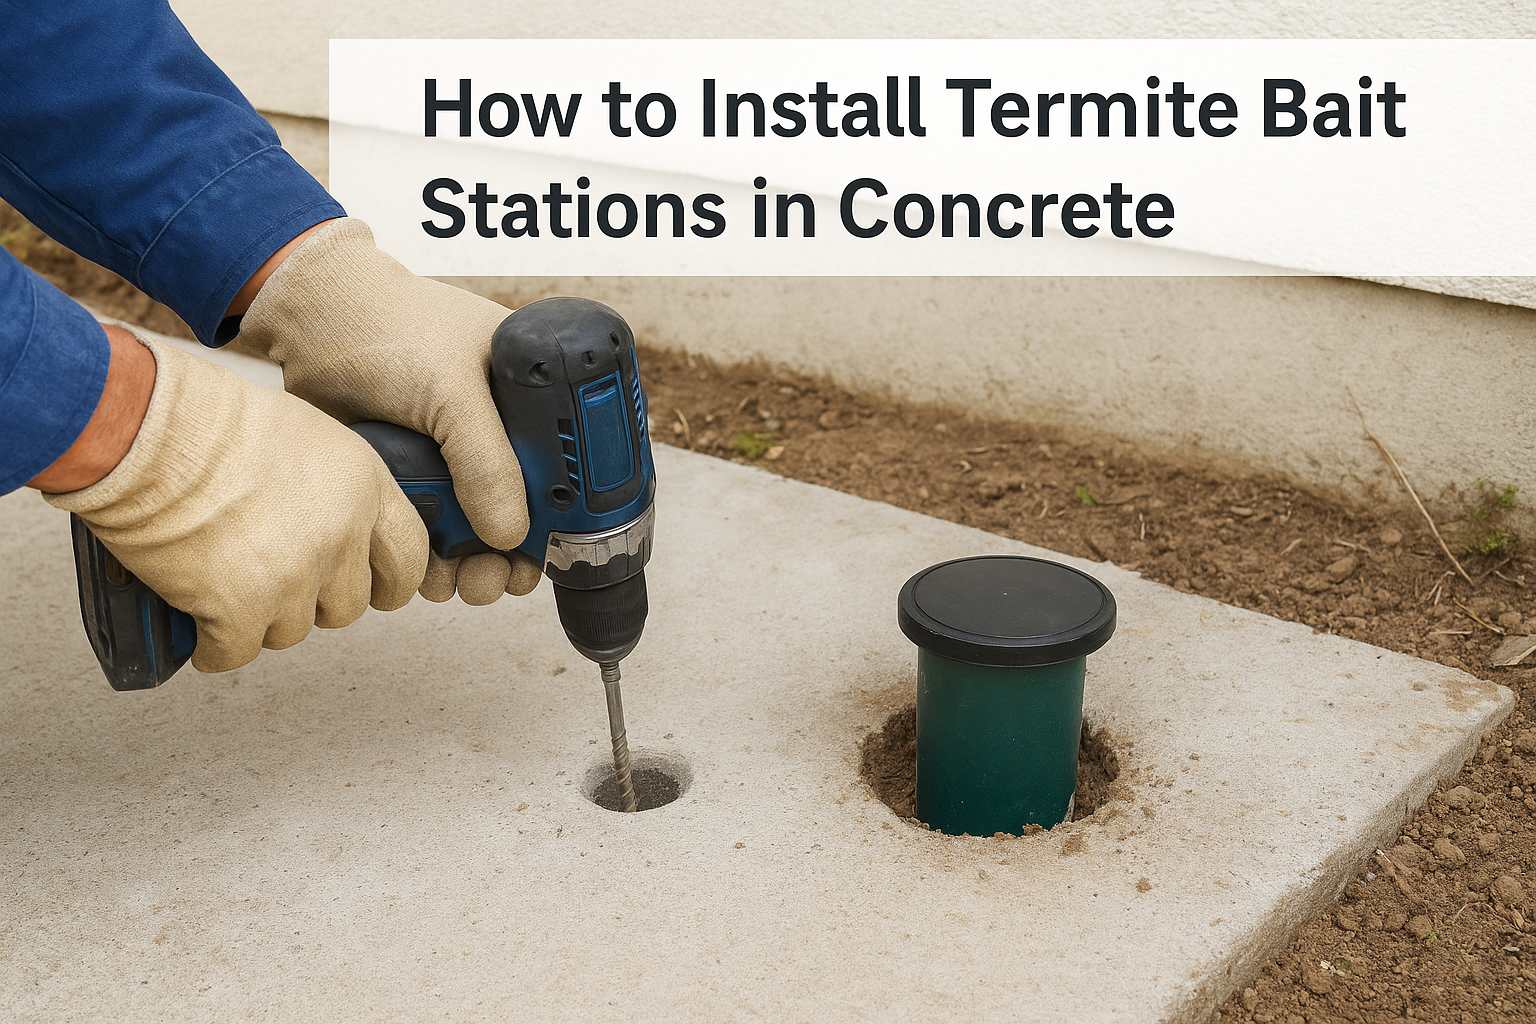
Concrete floors and driveways look like a wall against termites, until you spot mud tunnels creeping along a slab edge or discarded wings near a doorway. Termite bait stations in concrete solve a problem that soil treatments can’t: getting bait into a colony’s path when there’s no exposed soil to drill into for a chemical barrier. This guide walks through exactly how it’s done, without guesswork.
Installing bait stations in concrete isn’t the same as placing them in a garden bed. You need the right drilling technique, correct spacing along expansion joints and slab edges, and a station design that survives foot traffic and monsoon moisture. We’ll cover both in-ground and above-ground station options, how to core through concrete without cracking it, and how to monitor bait uptake so you know the colony is actually feeding.
At Termite Professionals, we’ve handled termite issues in concrete-heavy homes and commercial buildings across India for over 32 years, so this isn’t theory. You’ll get practical installation steps, product pointers, and a realistic sense of when a DIY station makes sense versus when it’s time to call in a certified technician for long-term protection.
What Are Termite Bait Stations in Concrete
A concrete termite bait station is a small, sealed monitoring device set into or against a slab, designed to intercept subterranean termites moving through cracks, expansion joints, or utility penetrations in the concrete. Unlike a soil barrier treatment, which relies on a continuous chemical zone under the slab, a bait station works by attraction. It holds a cellulose matrix, sometimes untreated wood or paper to draw termites in first, then a slow-acting active ingredient like hexaflumuron or noviflumuron once feeding is confirmed. Termites carry the bait back to the colony, and it spreads through grooming and feeding contact, which is why one station can eventually affect thousands of termites you never see.
A bait station doesn’t kill on contact. It works because termites share food, and that sharing becomes the treatment.
There are two broad categories worth knowing before you drill anything.
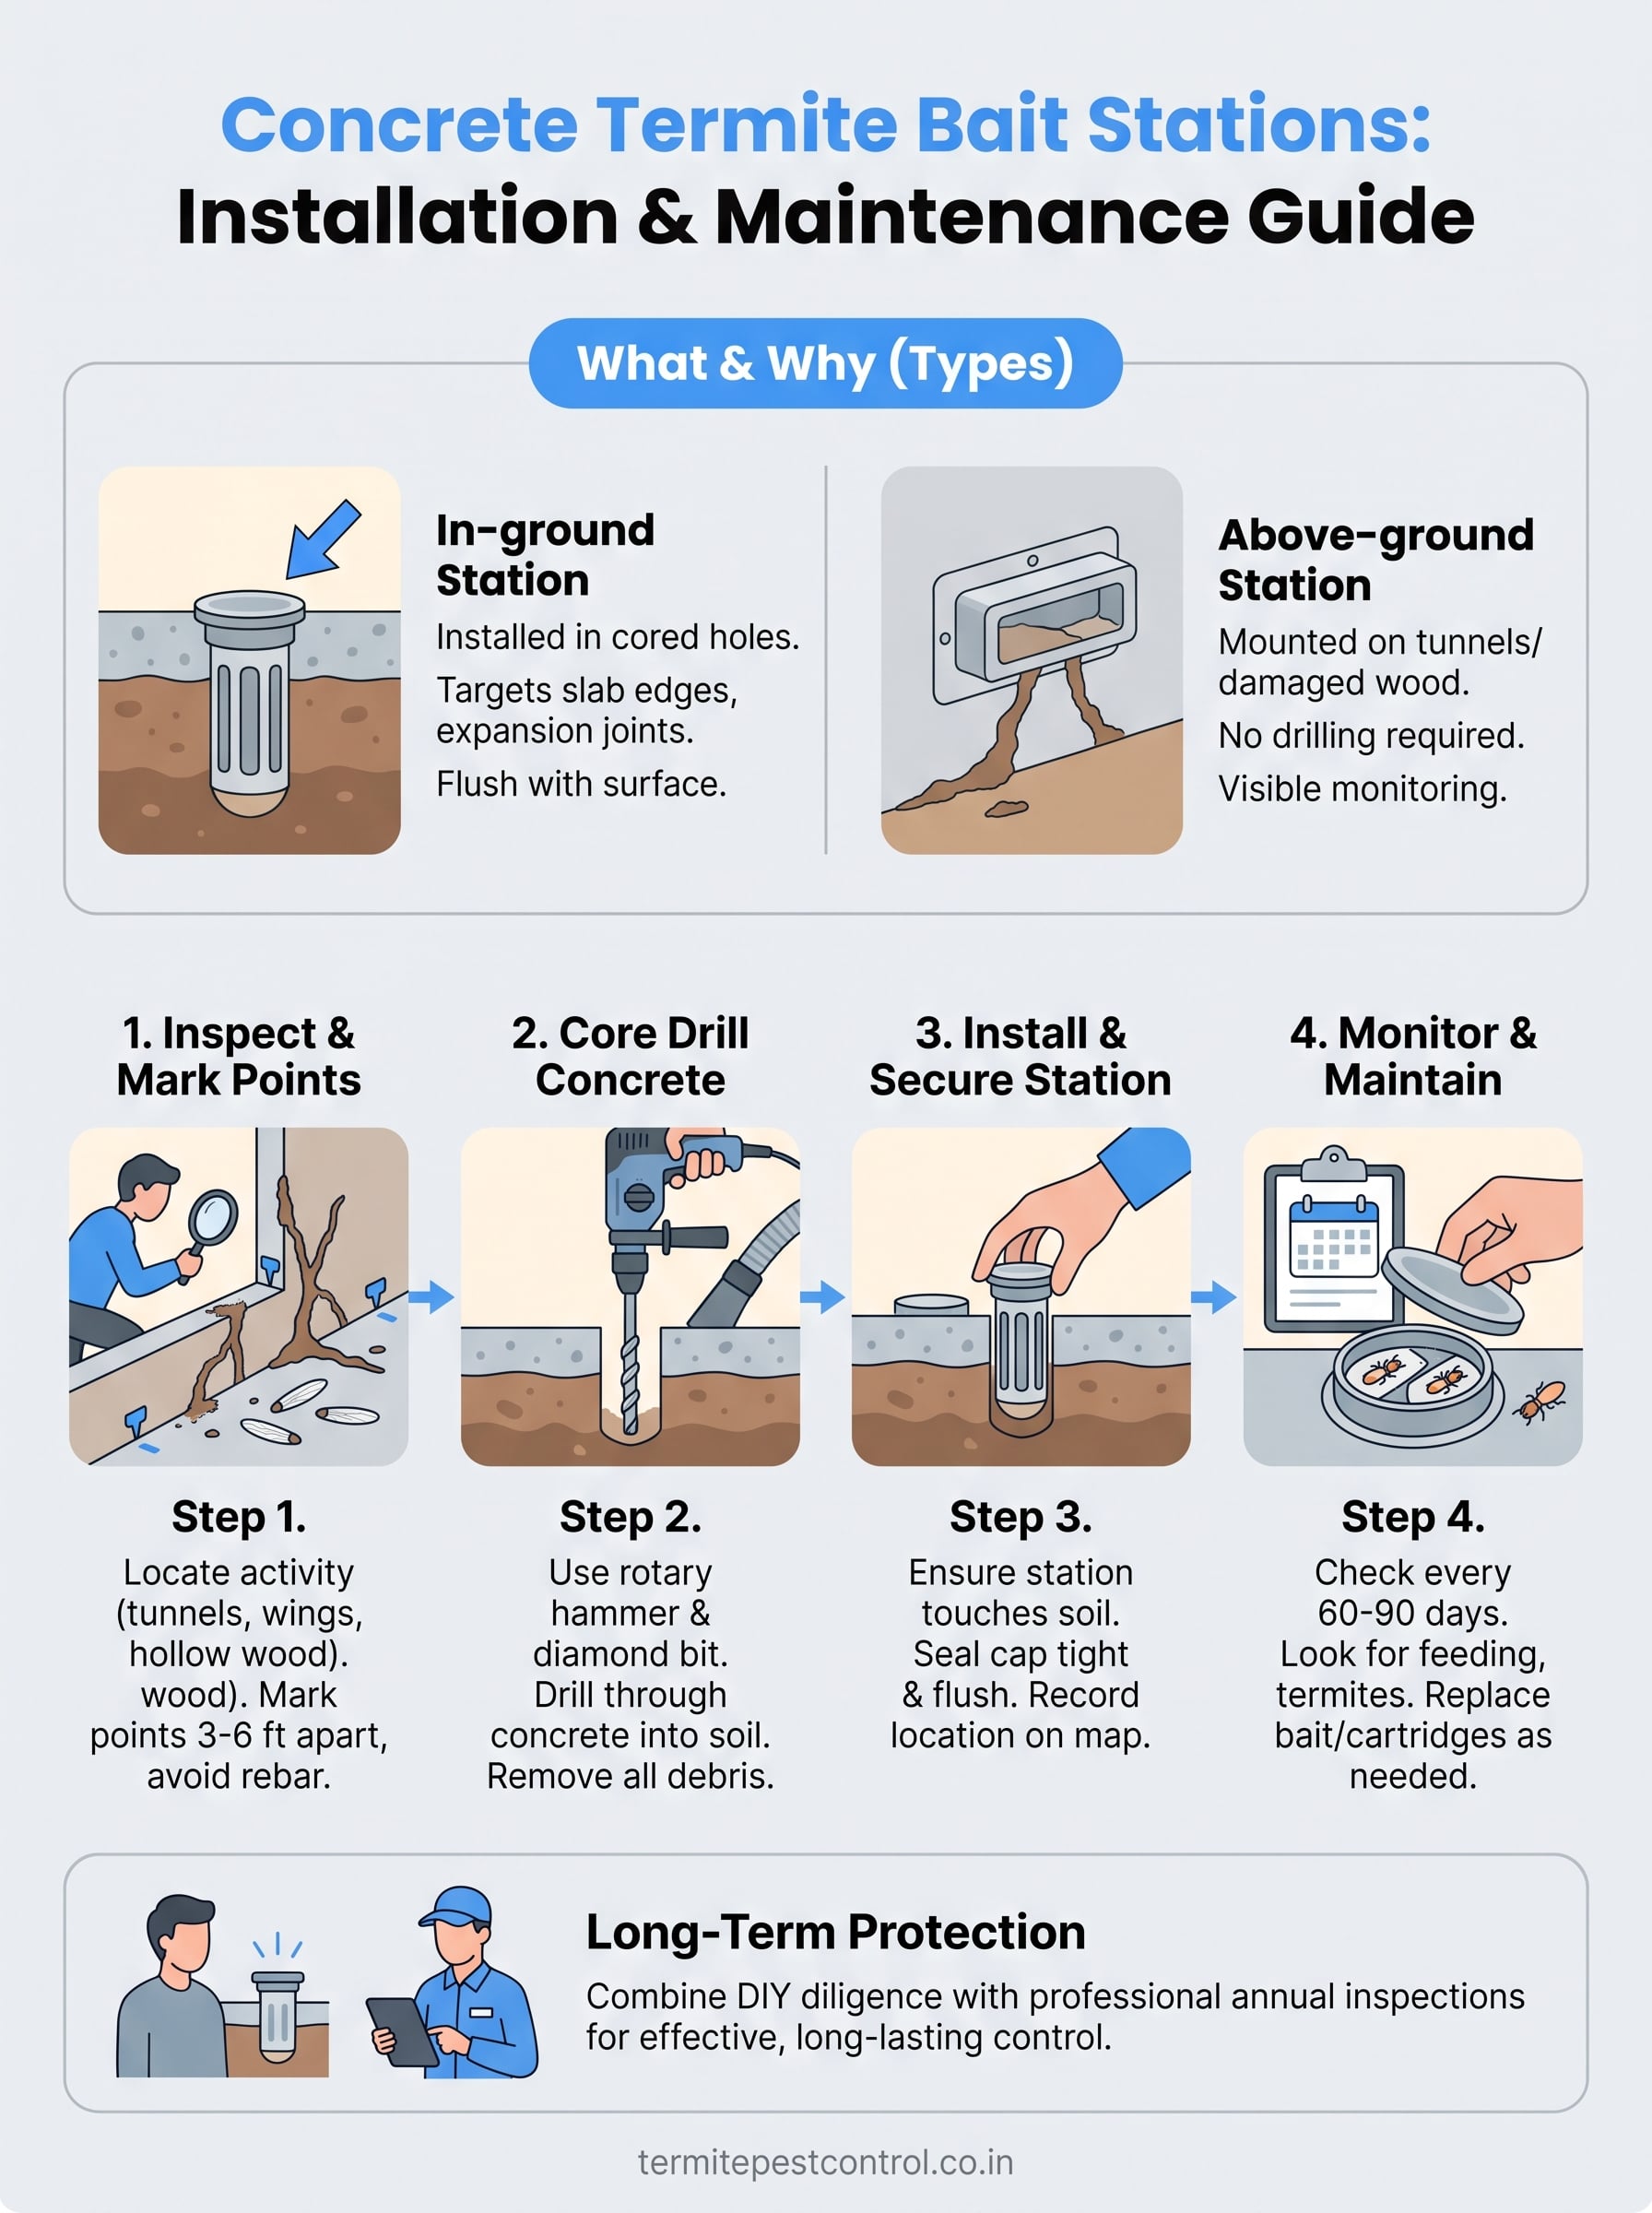
- In-ground stations: Installed through a cored hole in the slab, sitting flush with the surface, capped and often covered by a small access lid. These work well along expansion joints, plumbing penetrations, and slab edges where termites are already active.
- Above-ground stations: Mounted directly onto visible mud tunnels or damaged wood near the concrete, useful when drilling isn’t practical, such as on a finished interior floor or a heritage structure.
Each approach targets the same behavior: termites foraging along the narrowest, most predictable paths through and around concrete. Choosing between them, or combining both, depends on where the activity shows up and how much disruption you’re willing to accept when installing termite bait stations in concrete.
Step 1. Inspect the Area and Mark Termite Bait Station Points
Before any drill touches the slab, walk the entire perimeter and note where termite activity actually shows up. Mud tunnels along skirting, discarded wings near doors, or hollow-sounding wood are your best clues to where the colony is foraging, not where you assume it might be. Check expansion joints, plumbing penetrations, and slab edges first, since these are the natural entry points termites exploit in an otherwise solid barrier.
Once you’ve spotted activity, mark station points at roughly 3 to 6 feet apart along the affected wall or joint line, favoring spots directly over visible tunnels or cracks. A moisture meter helps confirm damp zones under the slab, since termites gravitate toward consistent moisture, and a simple screwdriver test on baseboards tells you if wood underneath is already compromised.
Mark stations where the termites already are, not where the slab looks convenient to drill.
Avoid placing points near structural rebar or load-bearing footings. If you’re unsure where reinforcement runs, a certified technician with a rebar scanner should map the slab first, since drilling blind here risks weakening the structure instead of stopping the infestation.
Step 2. Core Drill Through the Concrete for Bait Station Installation
Grab a rotary hammer drill fitted with a diamond-tipped core bit sized to match your station’s diameter, usually 2 to 3 inches for standard in-ground units. Drilling straight down at each marked point keeps the hole true and avoids widening it later, which weakens the surrounding slab.
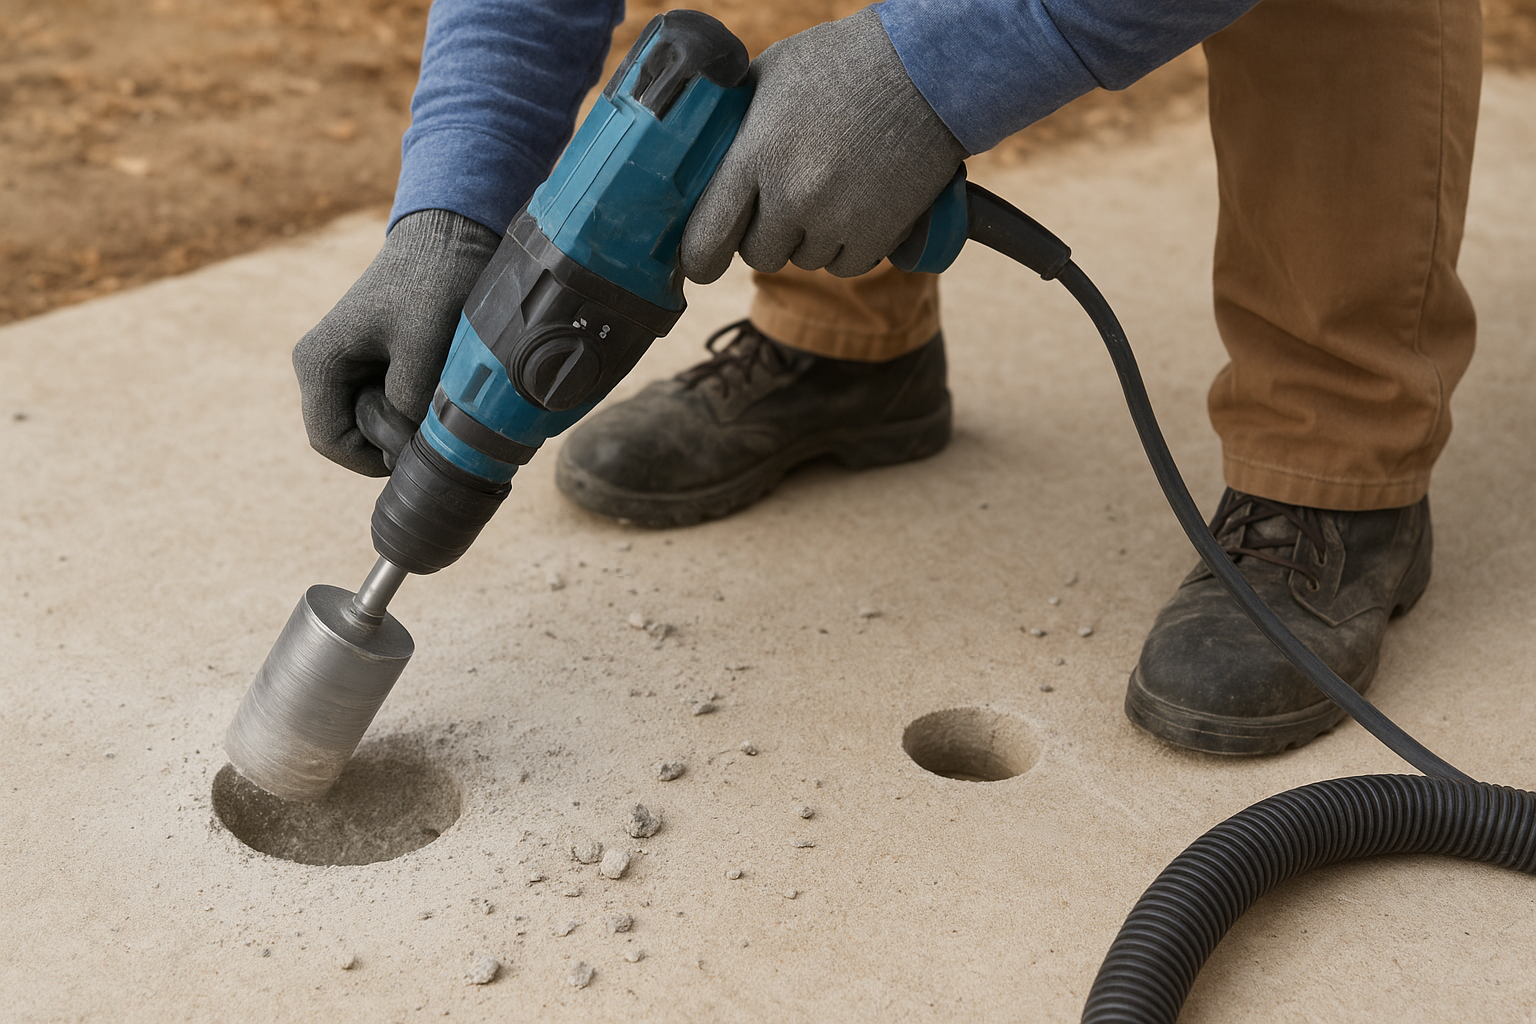
Drill for depth, not speed. A rushed hole cracks concrete and misses the termite gallery below.
Drilling checklist
- Mark the exact center point with a scratch awl before starting the bit.
- Drill through the full slab thickness, typically 4 to 6 inches, then continue a few inches into the sub-slab soil.
- Vacuum out concrete dust and debris immediately, since leftover dust can block termite movement into the station.
- Check the hole edges for cracking and smooth them with a masonry rasp if needed.
Once the hole reaches soil contact, you’ve created the same access point a soil barrier treatment would need, except now it houses a bait station instead of a chemical trench. This is where installing termite bait stations in concrete differs most from garden placements, since you’re working through several inches of hard material before ever touching the food source termites actually want.
Step 3. Install and Secure the Termite Bait Station
When placing termite bait stations in concrete, lower the station into the cored hole so its base sits firmly against the soil, not suspended in mid-air. Contact with soil matters here, since termites entering through cracks or galleries need a direct path into the cellulose matrix inside. Push down gently until the station’s rim sits flush with the concrete surface, avoiding any gaps that could let debris or water seep in around the edges.
A station that doesn’t touch soil is just an empty tube. Contact is what makes it work.
Secure the access cap tightly, checking that it locks or screws down without wobble, since loose caps invite dirt, insects, or curious pets. Most residential caps are designed to sit level with foot traffic areas like driveways or garage floors, so confirm the finished height doesn’t create a trip hazard.
Once sealed, log the station’s location on a simple site map or numbered diagram, marking distance from the nearest wall or joint. This record becomes essential during monitoring, especially across larger commercial slabs where dozens of stations might be installed. Skipping this step is one of the most common mistakes in DIY termite bait station in concrete installations, and it makes future inspections far harder than they need to be.
Step 4. Monitor and Maintain Termite Bait Stations in Concrete
Open each termite bait station every 60 to 90 days during the first year, since that’s the window when termites typically discover and start feeding on fresh bait. Check the cellulose matrix for tunneling, mud packing, or actual termite presence, and swap in fresh bait if the matrix looks dry, moldy, or untouched after two full cycles. Consistent monitoring is what separates a working bait program from a forgotten hole in your driveway.
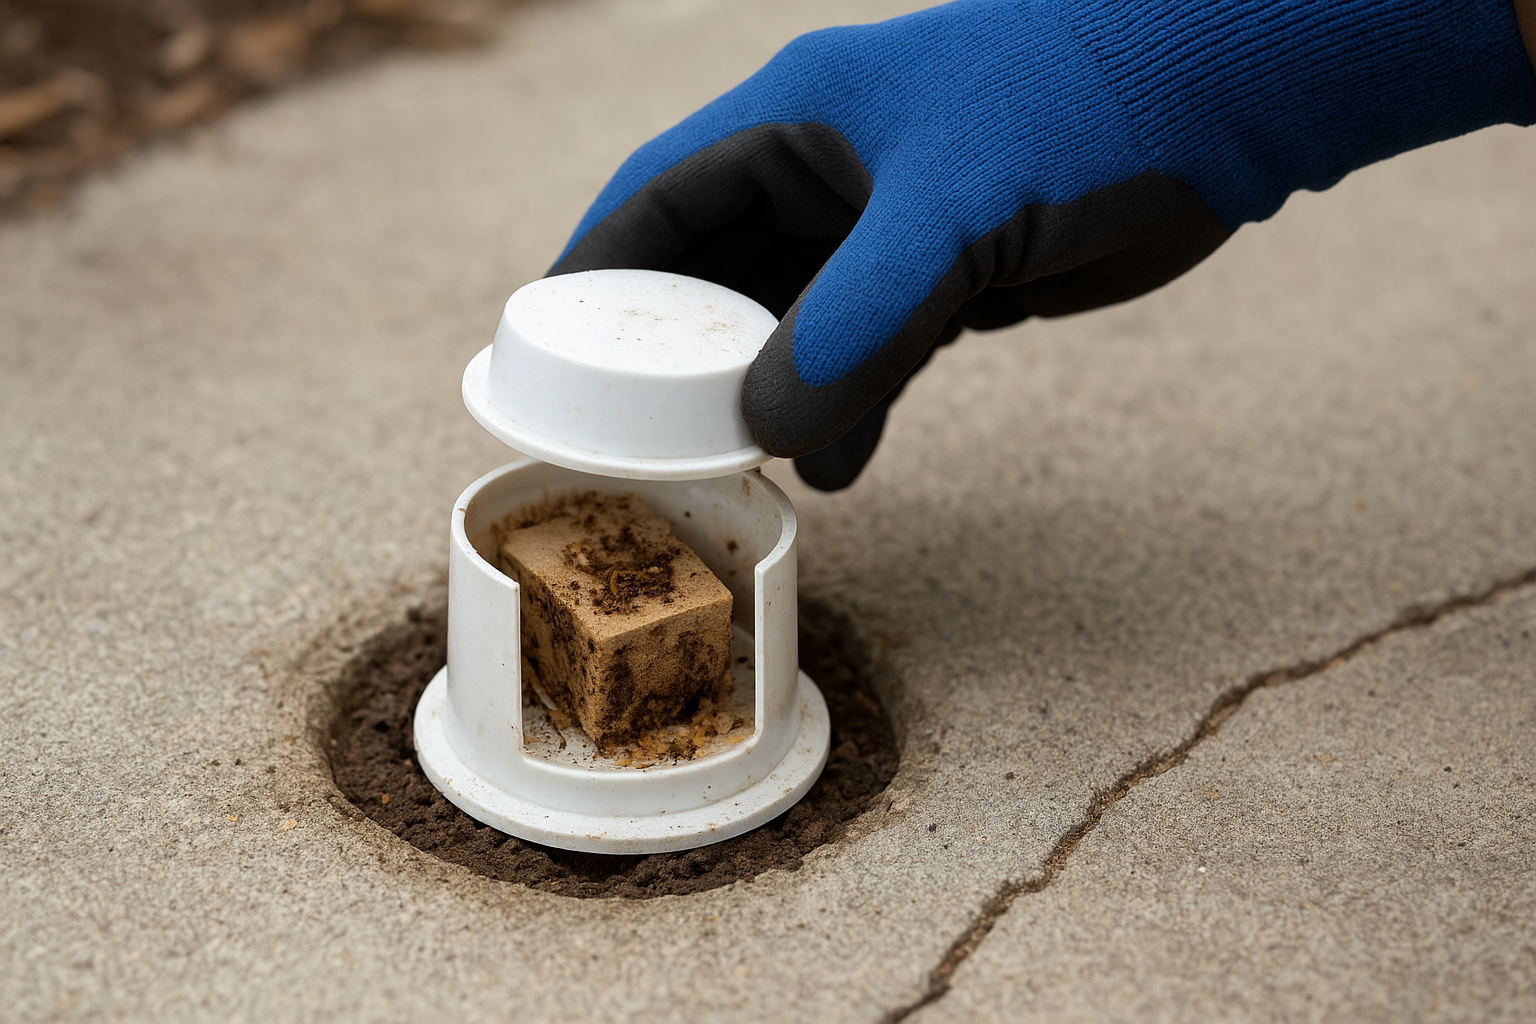
A bait station you never check is just a decoration in your slab.
What to look for at each check
- Live termites or soldiers inside the station
- Mud tubing built up around the bait cartridge
- Bait consumption levels, noted as light, moderate, or heavy
- Moisture buildup or water intrusion around the cap
- Cracks forming in the concrete around the access point
Adjusting the schedule
Once a station shows active feeding, some technicians switch the untreated bait for a toxic bait cartridge and shorten checks to every 30 days until activity stops. After the colony appears eliminated, most homes move to quarterly checks, then align with an annual maintenance contract for ongoing peace of mind.
FAQ
**Can I install termite bait stations in concrete myself, or do I need a professional?**You can install them yourself if you’re comfortable with a rotary hammer drill and diamond core bit, and confident about avoiding rebar. Many homeowners handle basic in-ground stations this way, but a certified technician brings a rebar scanner and experience reading activity patterns, which matters most on older homes or commercial slabs.
**How deep should the hole be for an in-ground station?**Drill through the full slab thickness, typically 4 to 6 inches, then continue a few inches into the sub-slab soil so the station base makes direct soil contact. A station that stops short of soil contact won’t intercept termites reliably.
**How often do I need to check the stations?**Every 60 to 90 days during the first year. Once a station shows active feeding, shorten checks to every 30 days until activity stops, then move to quarterly and eventually annual checks once the colony appears eliminated.
**What’s the difference between in-ground and above-ground stations?**In-ground stations are cored into the slab and work well along expansion joints, plumbing penetrations, and slab edges. Above-ground stations mount directly onto visible mud tunnels or damaged wood, useful when drilling isn’t practical, such as on a finished interior floor or a heritage structure.
**Can bait stations replace a soil barrier treatment entirely?**They solve the specific problem of getting bait into a colony’s path where there’s no exposed soil to treat, but they work by attraction and slow transfer rather than an immediate barrier. Pairing stations with regular professional inspection catches cracks, plumbing shifts, and reinforcement issues that monitoring alone can miss.
Getting Long-Term Termite Protection Right
Drilling, installing, and monitoring bait stations gets you most of the way there, but concrete slabs hide problems that a station alone can’t fully solve. Cracks widen, plumbing lines shift, and new mud tunnels can appear along joints you didn’t mark the first time around. Even a well-placed station needs a second set of trained eyes checking rebar clearance, cap seals, and bait uptake on a schedule you’ll actually stick to.
Getting termite bait stations in concrete right long-term means pairing DIY diligence with professional inspection at least once a year, especially on commercial slabs or older homes where reinforcement maps aren’t on file. That’s the gap most self-managed programs fall into, not the installation itself.
If you’d rather have certified technicians core, install, and monitor the stations correctly from day one, get a free termite inspection from Termite Professionals and skip the guesswork entirely.